NFT-Lending and Borrowing Dapp
Create NFT Lending and Borrowing using Pandora-express SDK
Intro
In this guide we will make NFT Lending and Borrowing Dapp using Express Protocol SDK through which anyone can lend or borrow tokens. We will use Pandora Public ERC721 contract for NFT minting and Pandora Market Contract for Lending through listing the NFT. You also need to connect a wallet, so make sure you have metamask wallet installed.
Alright without further ado, let's create our marketplace!
Prerequisites
Some Prequisites required before building the project:
NodeJS version > 16.0.0
NPM version > 6.0.0
Metamask Browser Extension
Parcel Bundler(For bundling Javascript)
Code
1.Creating Project:
Create an empty folder in your favourite editor. We will use VScode here.
2.SDK installation
Run in terminal
  npm init
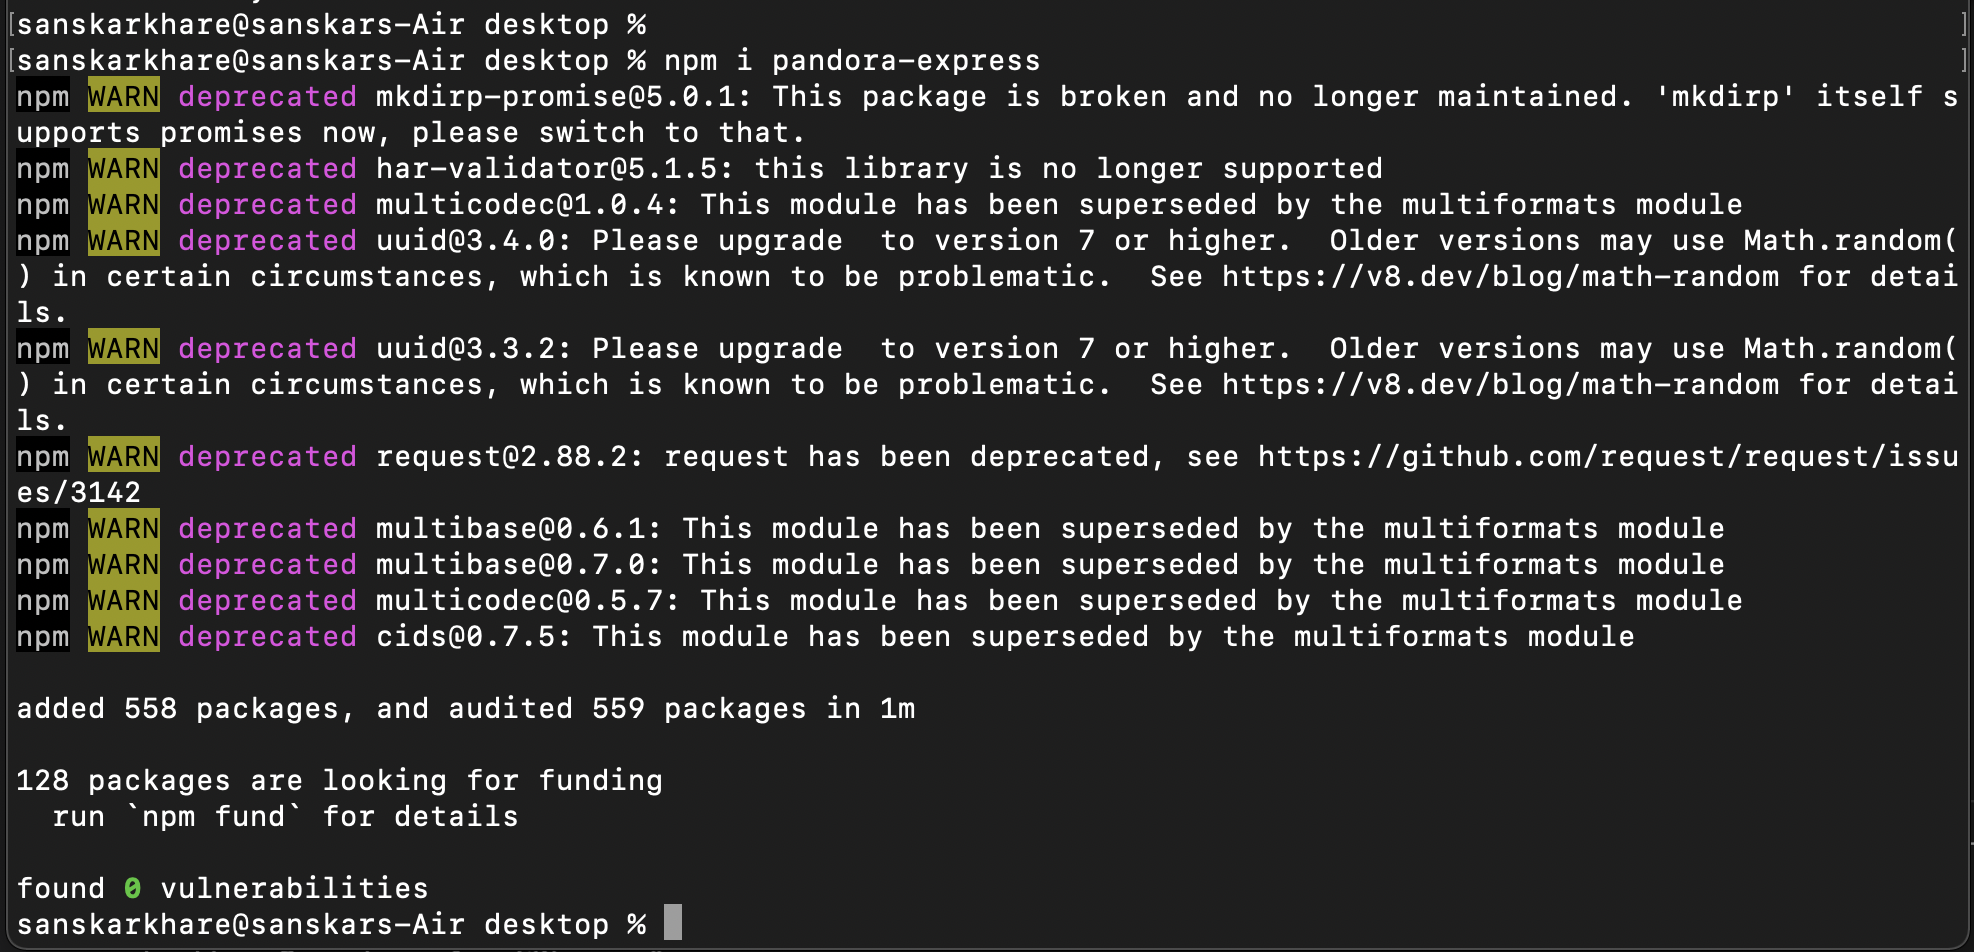
  npm i pandora-express
  npm install -g parcel-bundler

3.Building the UI
Make a index.html file and paste the following code.
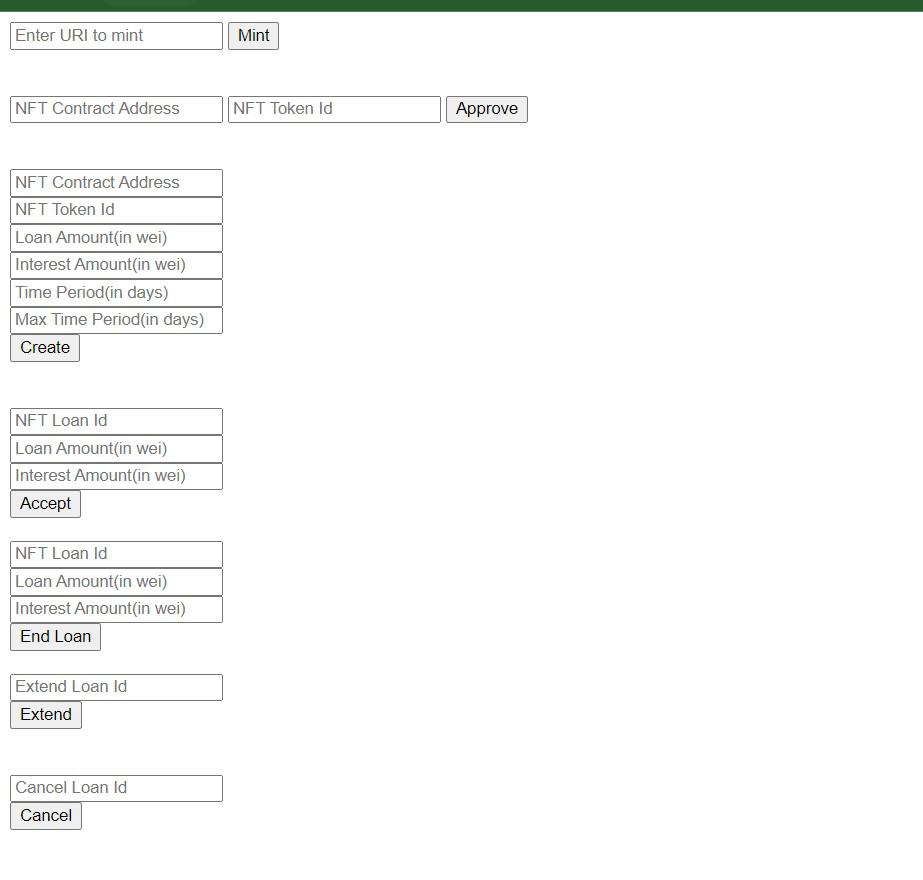
Here we will make seven input fields, User have to enter the URI to mint the NFT, and next fields we need to approve the NFT by taking the aurguments NFT contract address and NFT token ID. On next field we need to add NFT to the listing and enter the aurguments Loan Amount, intrest Amount, Time Period(in days) and Max Time Period(in days). On next field the lender will accpet the Loan and enters the aurguments NFT loan id, Loan Amount(in wei), intrest Amount(in wei). On nest field if the Borrower wants to end the loan then we will use End Loan to close the Loan. On next field Extend we will need to enter the Loan ID to extend upto the MAX time period entered in Creat function. and next if any of the lender gives you loan you can cancel and creat an other Loan.
<!DOCTYPE html>
<html lang="en">
<head>
    <meta charset="UTF-8">
    <meta http-equiv="X-UA-Compatible" content="IE=edge">
    <meta name="viewport" content="width=device-width, initial-scale=1.0">
    <title>Test NFT Lending</title>
</head>
<body>
    <script src="https://cdn.jsdelivr.net/npm/web3@latest/dist/web3.min.js"></script>
    <script type="module" src="main.js"></script>


    <div>
        <input type="text" id="mintNFT" placeholder="Enter URI to mint">
        <button id="mintBtn">Mint</button>
    </div>
    <br>
    <br>
    <div>
    <input type="text" id="nftContractAddress" placeholder="NFT Contract Address">
    <input type="text" id="nftTokenId" placeholder="NFT Token Id">
    <button id="approveBtn">Approve</button>
    </div>
    <br>
    <br>
    <div>
    <input type="text" id="nftContractAddress1" placeholder="NFT Contract Address">
    <br>
    <input type="text" id="nftTokenId1" placeholder="NFT Token Id">
    <br>
    <input type="number" id="loanAmount" placeholder="Loan Amount(in wei)">
    <br>
    <input type="number" id="interestAmount" placeholder="Interest Amount(in wei)">
    <br>
    <input type="text" id="timePeriod" placeholder="Time Period(in days)">
    <br>
    <input type="text" id="maxTimePeriod" placeholder="Max Time Period(in days)">
    <br>
    <button id="createBtn">Create</button>
    </div>
    <br>
    <br>
    <div>
        <input type="number" id="loanId" placeholder="NFT Loan Id">
         <br>
        <input type="number" id="loanAmount1" placeholder="Loan Amount(in wei)">
         <br>
        <input type="number" id="interestAmount1" placeholder="Interest Amount(in wei)">
         <br>
        <button id="acceptBtn">Accept</button>
    <br>
    <br>
    </div>
    <div>
        <input type="number" id="loanId2" placeholder="NFT Loan Id">
         <br>
        <input type="number" id="loanAmount2" placeholder="Loan Amount(in wei)">
         <br>
        <input type="number" id="interestAmount2" placeholder="Interest Amount(in wei)">
         <br>
        <button id="endBtn">End Loan</button>
    <br>
    <br>
    </div>
    <div>
        <input type="number" id="extendLoanId" placeholder="Extend Loan Id">
        <br>
        <button id="extendBtn">Extend</button>
    </div>
    <br><br>
    <div>
        <input type="number" id="cancelLoanId" placeholder="Cancel Loan Id">
        <br>
        <button id="cancelBtn">Cancel</button>
    </div>

</body>
</html>
As we have pasted the code, now our frontend will look something like this:

4.Using SDK code with our javascript Logic
Make a Javascript file, name it main.js, Now we have to import SDK function in our Dapp and add Mint function and make connection with blockchain using metamask. Paste the code below in main.js file.
//Import createPandoraExpressSDK from SDK
  const { createPandoraExpressSDK } = require("pandora-express");
  const pandoraSDK = createPandoraExpressSDK();

  mint = async () =>{
//get current account address
  const accounts = await web3.eth.getAccounts();
//Get ChainID of current account
  const chainId = await web3.eth.net.getId();
//Mint NFT using SDK erc721 nft mint
  console.log(chainId);
  await pandoraSDK.erc721.nft.mint(web3, chainId, accounts[0], itemURI.value, [
    [accounts[0], 100],
  ]);
}
const itemURI = document.getElementById("mintNFT");

const createItemButton = document.getElementById("mintBtn");
createItemButton.onclick = mint;

const REQUEST_STATUS = ["Pending", "Active", "Cancelled", "Ended", "Defaulted"];

const LENDING_CONTRACT_ADDRESS = '0x67490a4814a5C127B0522b40d2DaEdF6104BdeA6';
//Connecting with Metamask wallet.
const init = async () => {
//check if metamask is present
    if (window.ethereum) {
    window.web3 = new Web3(window.ethereum);
    await window.ethereum.enable();
    console.log("Connected");
  } else {
    alert("Metamask not found");
  }
  };

const nftContractAddress = document.getElementById("nftContractAddress");
const tokenId = document.getElementById("nftTokenId")
We have minted a NFT using the SDK now, we can approove the NFT by using approveNFT function of the SDK. Define the approveNFT function as written below.
  approveNFT = async () => {
   const web3 = new Web3(window.ethereum);
   const accounts = await web3.eth.getAccounts();
   console.log(accounts[0]);

   const instance = new web3.eth.Contract(tokenABI,nftContractAddress.value,
    {from: accounts[0]});

    await instance.methods.approve(LENDING_CONTRACT_ADDRESS,
      tokenId.value
      )
      .send({
      from: accounts[0],
      })
      .once("receipt", (receipt) => {
        console.log(receipt);
      })
      .catch((err) => {
        console.log(err);
      });
};
We have approved the NFT!!, now that NFT contract address has been approved now it can have access to Lending and Borrowing.
now you can creat a loan by createLoan function that will creat a loan on the NFT contract address.
Try pasting the code below for Creating a Loan.
createLoan = async () => {
  const web3 = new Web3(window.ethereum);
  const accounts = await web3.eth.getAccounts();
  const instance = new web3.eth.Contract(contractABI, LENDING_CONTRACT_ADDRESS, {from: accounts[0]});

  await instance.methods.createLoan(nftAddress.value,
    nftId.value,
    loanAmount.value.toString(),
    interestAmount.value.toString(),
    totalTimePeriod.value * 86400,
    maxTimePeriod.value
  ).send({
        from: accounts[0],
      })
      .once("receipt", (receipt) => {
        console.log(receipt);
      })
      .catch((err) => {
        console.log(err);
      });
};
Now we have created a loan which takes NFT Contract address, NFT Token id, Loan Amount(in wei), Intrest Amount(in wei), Time Period(in days), Max time period(in days).
For Lender to accept the Loan we need to use acceptLoan function. Try pasting the code below for accepting the Loan.
acceptLoan = async () =>{
  const web3 = new Web3(window.ethereum);
  const accounts = await web3.eth.getAccounts();

  const instance = new web3.eth.Contract(contractABI, LENDING_CONTRACT_ADDRESS,
  {from: accounts[0]});
  const sum = ethLoanAmount.value.toString();

  await instance.methods.acceptLoan(loanID.value).send({
        value: sum,
        from: accounts[0],
      })
      .once("receipt", (receipt) => {
        console.log(receipt);
      })
      .catch((err) => {
        console.log(err);
      });
}
Now if borrower wants to end the loan before the period he can use endLoan function. we need to add endLoan function to our main.ja file. Try pasting the code below to end the Loan.
endLoan = async () => {
  const web3 = new Web3(window.ethereum);
  const accounts = await web3.eth.getAccounts();
  const instance = new web3.eth.Contract(contractABI, LENDING_CONTRACT_ADDRESS, {from: accounts[0]});
  const sum = ethLoanAmount1.value*1 + ethInterestAmount1.value*1;
  console.log(sum);
  await instance.methods.endLoan(loanID1.value).send({
    value: sum.toString(),
    from: accounts[0],
  })
  .once("receipt", (receipt) => {
    console.log(receipt);
  })
  .catch((err) => {
    console.log(err);
  });

}
Now when we creat a lone we need to enter "MAX Time Period(in days)" this are the days that can be extended after the dead-line to use this functionality we have extendLoan function. Try pasting the code below to extend the Loan.
extendLoan = async () => {
  const web3 = new Web3(window.ethereum);
  const accounts = await web3.eth.getAccounts();
  const instance = new web3.eth.Contract(contractABI, LENDING_CONTRACT_ADDRESS, {from: accounts[0]});

  await instance.methods.extendLoan(extendLoanId.value).send({
    from: accounts[0],
  })
  .once("receipt", (receipt) => {
    console.log(receipt);
  })
  .catch((err) => {
    console.log(err);
  });
}
Now if a borrower wants to cancel a listing he can use cancelLoan function. Try pasting the code below to cancel the Loan.
cancelLoan = async () => {
  const web3 = new Web3(window.ethereum);
  const accounts = await web3.eth.getAccounts();
  const instance = new web3.eth.Contract(contractABI, LENDING_CONTRACT_ADDRESS, {from: accounts[0]});
  await instance.methods.cancelLoan(cancelLoanId.value).send({
    from: accounts[0],
  })
  .once("receipt", (receipt) => {
    console.log(receipt);
  })
  .catch((err) => {
    console.log(err);
  });
}
5.Getting Data from User from Frontend
Now as we defined the functions for our NFT Lending and Borrowing, the last step is to get the function parameters using javascript DOM.
Paste the code written below to main.js.
const approves = document.getElementById("approveBtn");
approves.onclick = approveNFT;

const nftAddress = document.getElementById("nftContractAddress1");
const nftId = document.getElementById("nftTokenId1");
const loanAmount = document.getElementById("loanAmount");
const interestAmount = document.getElementById("interestAmount");
const totalTimePeriod = document.getElementById("timePeriod");
const maxTimePeriod = document.getElementById("maxTimePeriod");

const create = document.getElementById("createBtn");
create.onclick = createLoan;

const loanID = document.getElementById("loanId");
const ethLoanAmount = document.getElementById("loanAmount1");
const ethInterestAmount = document.getElementById("interestAmount1");

const accept = document.getElementById("acceptBtn");
accept.onclick = acceptLoan;

const extendLoanId = document.getElementById("extendLoanId");

const extend = document.getElementById("extendBtn")
extend.onclick = extendLoan;

const cancelLoanId = document.getElementById("cancelLoanId");

const cancel = document.getElementById("cancelBtn")
cancel.onclick = cancelLoan;

const loanID1 = document.getElementById("loanId2");
const ethLoanAmount1 = document.getElementById("loanAmount2");
const ethInterestAmount1 = document.getElementById("interestAmount2");

const end = document.getElementById("endBtn")
end.onclick = endLoan;

init();
Now run in terminal
parcel index.html
That's it!
Congratulations! You have created your own NFT Lending and Borrowing Dapp If you want to use this functionality and numerous others like timed auction, creating collection, bidding, etc today in your app, check out the section which gives you a plug and play SDK component for front end.